Tuesday, March 30, 2010

Arati puvvuu paatoli- Banana Flower & Lentil Curry


Ingredients

1 small cup Pacchi senagapappu/chanadal
1 small cup kandhi pappu/toordal
5to 6 Endumirapakayalu/red chilly
1/2 tsp jeelakarra/jeera
1/2 tsp heeng/inguva
salt to taste
1/4 cup oil
1 medium size banana flower

Preparation
Soak dals for 2 hours
Peel banana flower and remove buds
From each bud remove the transparent petals and thick headed strings and throw them away
Peel the banana flower as shown in picture
Cut all the flower buds in to small pieces.
Chop the remaining flower in to small pieces
In a bowl put these chopped pieces and add turmeric powder and water
Grind soaked dals , redchillis, jeera, heeng and salt without adding water.
Sqeeze water from flower and pressure cook them for 4 whistles.
Heat oil in a pan and if you want add popu/tadka
Add grinded batter and stir
When the batter is half cooked add cooked flower and stir.
Fry them until it becomes dry

This curry goes with white rice, ghee and ullipaya pulusu.
Banana flower is good for health.It helps in getting rid of kidney stones.

This dish is bit tedious to prepare but the taste is well worth the effort. I suggest you to cook this atleast once a month as it's good for health.

బజ్జీ- Bajji- Fritters

Serves: Three. Preparation time: 40 minutes


Ingredients:
1 cup Bengal gram flour (Bésan, Senagapindi)    
1/4 cup Rice flour (Chával ká átá, Beeyappindi)
1/2 Tsp Garam masala powder
1 Tsp Red Chilli powder or to taste
1 level Tsp Salt or to taste
1/2 Tsp Tsp Cumin seeds (Jheera, Jilakara)
1/2 Tsp Turmeric (Haldi, Pasupu)
2 pinches Asafoetida (Heeng, Inguva)

1 heaped cup vegetables (eg; Potato, Plantain, Ridge gourd)
1/2 cup water
Oil to fry

Method:
1. Wash, peel and thinly slice the vegetable into rounds. Set aside.  
2. Place a cauldron of oil on heat so that it is ready by the time we prepare our Bajji batter/dough.
3. In a bowl, sift together all the flours and spices, make sure that they are evenly mixed.  
4. Add a little over 1/2 cup of water to the bowl, mix well making sure to break up any lumps. You may need to add a little bit more of water to get the right consistency. It should be thinner than Idli batter but slightly thicker than Dosa batter. (This benchmark has already been explained in Idli, also refer to step 6. for further explanation on batter consistency). 
5. The oil must be hot enough to fry. Drop a grain sized amount of dough/batter into the oil to test, if it sinks to the bottom and then rises up foaming, oil is hot enough. 
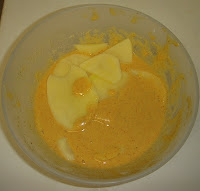
6. Dip each vegetable round into the batter, the batter covers the vegetable and coats it evenly but is thick enough not to drain away completely, it slowly drips off the vegetable. Drop this coated vegetable round into the oil. Repeat this step until the surface of the oil is full of frying Bajjis
7. While the Bajjis are frying, line a plate with blotting paper. Stir the Bajjis to turn them around for even frying. 
8. When the Bajjis are golden brown (around 7 minutes but depends on oil temperature and also what vegetable/how thick the rounds are), pick them out with a slotted ladle and transfer onto the plate lined with blotting paper.  
Serve hot with Tomato ketchup or any chutney. Bajjis are great on their own too. 


Variations:
Bajjis can be made from a variety of vegetables. Potato, Plantain, Ridge gourd, Onions, Capsicum, Chillies (if not hot), Eggplants, Zucchini (Courgette, Summer Squash), Cauliflower.
Optional: You may add half a teaspoon of ginger-garlic paste into the batter/dough.
Professional cooks add a pinch of baking soda, it makes the bajjis come out fluffy. However, they soak up more oil and end up with a higher dose of sodium.


Culture & Health:
Called 'Pakoda' by some, 'Bajji' by others, they say a perfect rainy day activity is to sip hot tea or coffee with piping hot pakodas.
I love the taste of soggy leftover Bajjis on the day after they're made, the vegetable flavour permeates into the fried soggy batter. Others like refried Bajjis, leftover soggy Bajjis come out extra crisp when fried again on the next day.
Bhajji-pav is a favourite street-side food sold by cart-vendors in Mumbai. It consists of a potato bajji jammed between a bun, with green chutney, tamarind chutney and other spices.
I don't want to defame/slander the reputation of such a yummy preparation by starting on its health angle. Let me just say, chickpea flour is a good source of protein, while the vegetable provides vitamins & minerals ;-) :-P
On a serious note, we all know that fried foods do all the bad things possible to our system. The vegetable loses most of its vitamin load in the frying process. This preparation is not recommended for regular consumption, it is not for the health conscious, it is not for those on any kind of dietary restrictions. It is full of oil (empty calories: a no no for diabetics. all that cholesterol: a no go zone for heart patients. all that fat: stresses our dear liver, a complete no entry for those with a problem liver/kidneys) and sodium (so much salt/soda, a no no for high blood pressure candidates, gout candidates, arthritic personalities, those on dialysis... I believe most diseases are exacerbated by sodium intake, so we need to watch out!).
And Baba Ramdevji says besan is very bad for health, so don't even feel good about the protein. :-)

Trivia:
If there is one thing that I remember my mother cooking regularly, it's pakodas and bajjis!!
Warning: This food is highly addictive and difficult to resist. ;-)

Monday, March 29, 2010

Idli Chutney

Serves: Four persons. Preparation time: 20 minutes

Ingredients:
1 cup Peanuts
1/4 cup Split Bengal gram (Chana dal, Senaga pappu)
1/2 tbsp tamarind pulp
1/2 tsp Salt or to taste
2 Dry Red Chillies or to taste

For Tempering:
1 tsp split black gram (Urad dal, Minappappu)
1 tsp Mustard seeds
2 pinches Asafoetida
3 Curry leaves (Kadipatta, Karuvepaku)
1 tsp oil

Method:
1. Break the Dry Red Chillies into pieces and dry roast them until they turn red-brown and give off an aroma, around 2 minutes on a low flame. Set aside. 
2. Dry roast peanuts until they are browned and give off an aroma, around 2 minutes on a low flame. You may use a drop of oil. Set aside. 

3. Dry roast the Senaga pappu until it turns light golden brown and gives off an aroma, around 1 minute on a low flame. Set aside.
4. When the ingredients from steps 1. to 3. cool down, grind them in the mixer with salt and water (around 1 cup) to make a smooth paste. Transfer the chutney into a bowl and mix in the tamarind paste. It may look runny initially, but the peanuts/bengal gram soak & absorb the water thereby improving its consistency.
5. Heat oil in a small saucepan or flame proof ladle. Add Minappappu. When it browns, add Heeng, Mustard seeds and Curry leaves. Turn off the heat. Pour this tempering over the chutney and stir it in. 


Variations:
Use more tamarind paste if you like sour tones. Some recipes include desiccated coconut powder or fresh grated coconut. You may also add green chillies during the grinding process. Yet others include garlic, though it is really not traditional.


Culture & Tradition:
This chutney is traditionally served with Idli or Dosa


Trivia:
This recipe courtesy Manju pinni.

Sunday, March 28, 2010

ఉల్లిపాయ పులుసు / Vullipaaya Pulusu/ Onion Stew


Ingredients
2 big onions/ vullipayalu
1/2 tsp chilly powder(adjust as per taste)
salt to taste
1tbsp oil
1 big marble size tamarind/ chinthapandu

Popu/ Thadka Ingrdients
Cumin seeds
Mustard seeds


Preparation

Soak tamarind. Chop onions into small cubes.
Heat oil and add thadka ingredients.
Add onions and fry them until light brown
Squeeze tamarind and add this juice to the onions
Now, add salt and chilly powder boil them
In a bowl take chana flour, add water and make a paste and add this paste to pulusu.
Let it boil for 2 more minutes.

This will go with rice along with kandi pachadi and sandigapindi.

Tuesday, March 16, 2010

సున్నుండలు/ Sunnundalu/ Black gram sweet balls


Ingredients

Urad dal – 2 cups
Jaggery – 1 1/2 cup (Grated)
Ghee – 1/2 cup
Cardamom -2 (optional)

Preparation
Roast the urad dal in a low heat till golden brown. Stir continuously, it takes about 15 to 20 minutes. Let it cool.
Now, take the roasted urad dal and grind it to a smooth powder using a mixer or a food processor. Add the grated jaggery and grind it again. If you want to add cardamom powder, you can add it now.
Melt the ghee and keep it aside.
Take the ground mixture in a bowl, add ghee until you get a consistency where you can mould them in the form of laddoo.


Variations :
We can use Sugar instead of jaggery. It tastes good either ways, but I like it with jaggery.

This is a very simple sweet and doesn't take much time to prepare.

వంకాయ- అల్లం పచ్చిమిరపకాయ: Vankáya Allam Pacchimirapakáya- Aubergine with Ginger & Green Chilli

Serves: Two. Preparation time: 30 minutes. 


Ingredients:
7 small round aubergines (Eggplant/Brinjal, Baingan, Vankáya)
4 Green chillies
1 inch Ginger (Adrak, Allam)
1 tsp split Chickpeas (Chana dalSenagapappu)
1 tsp split black gram (Urad dalMinappappu)
1 tsp Mustard Seeds (RaiAvalu)
1/2 tsp Turmeric (Haldi, Pasupu)
1/4 tsp Asafoetida (Heeng, Inguva)
3 Curry leaves (KadipattaKaruvepáku)
1 tsp Tamarind paste
1/2 tsp Salt (or to taste)
4 stems Cilantro (Kotimeer)
1 tbsp oil

Method:
1. Chop green chillies and ginger, pound into a paste using a mortar & pestle (or a mixer), set aside.
2. Quarter aubergines and set aside. (You may use any other variety if small round ones are not available, chop into 2" pieces.) 
3. Heat oil to medium hot. Add Minappappu & Senagapappu. When they brown, add Mustard seeds, Asafoetida, Turmeric. When mustard seeds splutter, add the Ginger-green chilli paste and curry leaves. Let the paste fry for a minute.
4. Mix in the aubergines and salt. Cover and cook. You may add 2 tsps of water if needed (Aubergines generally go soft very easily and do not need water).
5. Uncover and stir every 4 minutes. Cook until the flesh turns moist with a translucent hue and the skin discolours (greenish grey/brown black), around 10 to 15 minutes. 
6. Add tamarind paste when almost done. 
7. Garnish with chopped Cilantro after it is done.  
    Serve with fresh hot rice. Pairs very well with Chapati.


Precautions/Variations:
1. Chopped aubergines turn dark brown/black due to oxidation. Hence, chop them just before you begin heating the oil. Alternatively, immerse them in salt water to prevent oxidation.
2. Some recipes do not use Tamarind paste.  
3. Some recipes instruct to add the ginger-green chilli paste right at the end before turning off the heat. 
4. Green chillies may be adjusted according to taste. Use less if they are fiery, use more if mild. 
5. Manual pounding with a mortar-pestle lends a unique texture to the ginger-green chilli paste. If using an electric mixer/grinder, you may need to add a few drops of water. 
6. The traditional recipe demands lot of oil. However, a healthier version can be made by first roasting/microwaving the aubergines and then frying with less oil. My raw aubergines are brownish as they are pre-roasted. 
7. This same recipe can be replicated with Cluster beans (Guar, Goru chikkudu kaaya) & Jaggery instead of Aubergines. 


Refer to Manju pinni's Vankáya Mudda Koora recipe for an alternate version. 


Culture & Health
Aubergine, Brinjal, EggplantSolanum melongen-  is native to India and hence extensively used in Indian cuisine. India is the world's largest producer after China. Its flesh absorbs oil & spice so beautifully that every cook loves to experiment with aubergine. 
Eggplant helps to block the formation of free radicals and is a rich source of folic acid & potassium. Unfortunately, those are the only good lines on dear aubergine. 
Aubergines are richer in Nicotine than any other edible plant. They are rich in Histamines and commonly lead to allergic reactions upon consumption (almost 10 % of the Indian population was allergic according to a study). They are classified as a 'Visham' (Poison) in Ayurveda & Yoga/Pranayama, a food full of negative energy, to be avoided like meat/garlic/onion! Homeopaths advise against consumption of aubergine when on homeopathic medication. 
Jains do not consume Aubergine as it is full of seeds, a seed is a capsule of potential life, hence consumption is against Jaina dharma's Ahimsa principle. 


Trivia:
For all aubergine lovers, I am so sorry, why are most yummy things bad for health? I tasted aubergine last week after over 7 long years, and my my, I think I love it! 
This is another Chivukula favourite. Krishna's favourite, Sudhakar uncle's favourite, Anji uncle's favourite, who else is in love with this yummy Visham
This is my mom-in-law (Indira aunty)'s recipe. Kameshwari didi says that whenever Indira aunty made this at home, it was usually clubbed with Menthi Majjiga or Majjiga pulusu as all these recipes use ginger-green chilli paste. 

Friday, March 12, 2010

ఉగాది పచ్చడి: Ugadi pacchadi- Ugadi (Telugu New Year) sauce


INGREDIENTS:

1.1/4 cup Neem Flowers
2.1/2 cup Thick Tamarind Pulp
3.1/4 cup Raw Mango Pieces
4.Three Green Chillies sliced very thin
5. Salt to taste
6. Jaggery Powder to taste

METHOD:

Soak the tamarind in little water.take out the pulp.
Cut the the raw mango into very small pieces.
also cut the green chillies into small pieces.
make jaggery into powder.
now mix the all 6 ingredients into a bowl.this becomes like chutney. u should not make into very liquid type.
taste it for all the six ruchis , the 6 tases of sweet/sour/salty/bitter/spicy/astringent
this is a very good for health. specially when the seasons are changing from winter to a hot summer,
children tend to get the diseases like, chicken pox, measeles etc. this helps to fight it,
it also works to improve resistance and in killing worms/germs in the stomach

It is rich in C-Vitamin and Calories

This is eaten early in the morning of Ugadi, the Telugu New Year, to remind us that life is full of ups and downs and we should learn to enjoy all the various Rasas, emotions that come our way. Just as we learn to enjoy the taste of this pachchadi!

బీరకాయ పచ్చడి- Beerakaya pacchadi (Ridge gourd chutney)

Serves: Fills a 16 fl oz bottle. Preparation time: 40 minutes including washing/chopping vegetables, assembling ingredients, cooking & grinding. 
Ingredients:
2tsp split bengal gram (Dhula chana dal, Senagapappu)
2 tsp split black gram (Dhuli urad dal, Minappappu)
1 tsp Mustard seeds (Rai, Avalu)
7 pieces Dry red chilli (Endu mirapa)
1/2 Tsp Fenugreek powder (Methi, Menti)
3/4 tsp Asafoetida (Heeng, Inguva)
1 tsp Turmeric (Haldi, Pasupu)
1.5 tsp Cumin powder (Jheera, Jilakara)
1.5 tsp Coriander powder (Dhania)
4 pieces green chillies
2 Large sized Ridge gourds (Tori, Beerakaya)
3 tsps Oil
5 stems Cilantro (Kotimeer)
2.5 tsps Salt
3 tbps boiled tamarind paste


Method:
1. Wash and peel ridge gourds. (You could use the peel to make Beera kaya thokku pacchadi.) Chop into pieces. Chop the cilantro and set aside.
2. Heat 1 tsp oil, add gourds, salt and turmeric. Cover and cook until done, approximately 10 minutes. Leave to cool.
3. Heat 2 tsp oil. Add senagapappuminappappu, dry red chillies. When they brown & give off an aroma, add mustard seeds. When they splutter, add green chillies, add the powdered spices (Fenugreek, Asafoetida, Cumin, Coriander). Switch off flame & cover, the heat from the oil is enough to cook the spice powders & green chillies. Leave to cool.
4. Finely grind the roasted spices of step 3.
5. Add the tamarind paste, the cooked vegetables of step 2. and coarse grind with quick spurts of power on pulse/whip mode.
6. Transfer into a jar and add the chopped cilantro.
7. Refrigerate.

Serve with hot rice, with a generous topping of ghee. Can be used as a spread/dipping with savoury snacks, accompanies Idli/Dosa/Pesarattu.

Useful Tip/Trick:
Makes a delicious instant Raita/Perugu pacchadi if mixed into yogurt, the resulting raita even goes with north Indian dishes like Pulao or Alu parantha.

Variations:
1. Some recipes do not instruct to peel the ridge-gourd. It can be used whole with its skin, especially if it is young & tender. 
2. You may substitute Cumin/Coriander powders with seeds as they will get ground in the mixer. However, seeds will need more time to brown/splutter, adjust the sequence of adding into oil accordingly.
3. If using fenugreek seeds: Roast them to a black-brown, cool and powder. Add this pre-roasted powder to the cooled tempering from step (3). 
4. The ground spices resulting from step (3) and (4) can be used as a base for many other pacchadis. Instead of ridge gourd, one can add cooked red tomatoes or round yellow cucumbers (Dosakáya).
5. If you like the spices whole & crisp, do not grind them after step (3). Instead, pour the cooled tempering over the ground vegetables. 


Culture & Health:
A very good for health pacchadi, ridge gourd is low in calories, rich in vitamins & minerals. It is an excellent source of dietary fibre. This pacchadi is great taste with great health as it needs very little oil. It is best prepared fresh in small quantities, enough to last for three or four days. This is a typical Telugu preparation.

Trivia:
I learnt this recipe from my mom-in-law (Indira aunty). Krishna really adores his mother's pacchadis. I first started experimenting with pacchadis under aunty's guidance and I must say I am thoroughly addicted to her recipes, perhaps I eat even more pacchadi than Krishna!!

Tuesday, March 9, 2010

ఇడ్లి పిండి: Idli Pindi- (South Indian rice cake batter)


THE COMPLETE IDIOT'S GUIDE TO MAKING IDLI BATTER

History:
All my life, my very busy parents made us eat idlis every morning. A very easy recipe, the batter can be stored in the refrigerator, it just cooks without needing to be watched over, a balanced diet of carbohydrate-protein. Westerners are obsessed about 'live cultures' and 'probiotics'. Well, Idli is full of that magic ingredient!
I always took Idli for granted, it was the Yatra-Tatra-Sarvatra in our home. 
But I never bothered to closely watch my dad as he prepared the batter, and hence, I was unable to replicate it in my own kitchen. Every lady seems to have her own recipe & her own armour of tricks to "get-it-right", I was confused with the variety of advice pouring in, but my batter never turned out perfect. I made all kind of errors that I can write a book on! I had the simplest doubt which nobody was able to solve on phone, "How much water to add?". How much water equals "some water"? How much water equals "enough water"? And Idli pindi seems to be the benchmark in all batter based cooking. When my sister explained the "very easy Malpova" recipe, she said, "the batter should be thinner than Idli but thicker than dosa. I was at a loss, how can I progress in cooking if I don't master the benchmark? Unfortunately for me, phone conversations and textual explanations couldn't help, I needed a live demonstration, but I had no experienced person near me to help. 
I thought I was the only confused soul, but I noticed other cousins too were confused (though nobody turned out as pathetic as me). 
Then Manju pinni came to our rescue, she took up the mammoth task of answering my "water" question. She said they too had such doubts when they were new to the kitchen, but they could watch & learn. Whereas our generation is dispersed here & there, we live alone without parental guidance. So she decided to make life easier for cooks like me. So here I am, compiling the "Complete Idiot's guide to making Idli batter". I own up to being an Idli Idiot, I couldn't master the "easiest" recipe of Andhra cuisine in one year of marriage. 
Thanks to Manju pinni for transforming this idiot into somebody who can dare to cook idlis!!! 
I was amazed at how much Manju pinni knows about Idlis, she is a perfect trouble-shooting guide, full of tips & suggestions, warnings, tricks, variations. Wow, no wonder they say that our Indian culture is preserved in our family traditions, in our kitchens. The mother of the house is a repository of knowledge, things she learnt from her own experimentation, things that were passed down to her from her mother & mother-in-law, she carries the gastronomical history of our ancestors.
I will keep updating this blog entry as and when we learn more from Manju pinni on the mysteries of "Idli". I request readers to pass on any valuable comments, I will include them into the revised version. 
I do not take ownership for this blog entry, I am merely the compiler, the idea & research behind this belongs entirely to the senior contributors of this blog. 


I: BATTER


Methods:
I say "methods" instead of method, because there are several variations in the basic idli recipe. The minappappu is standard. But the other component (Idli rava, ordinary rice, parboiled rice) changes, and so does the grinding equipment (grinder or mixer).  They are listed as follows:


1. With Idli rava
a. using electric wet grinder with stone base
b. using ordinary standard food processor (mixer/blender)


2. With ordinary rice
a. using electric wet grinder with stone base


b. using ordinary standard food processor (mixer/blender)


3. With parboiled rice "Uppudu beeyam"


a. using electric wet grinder with stone base


b. using ordinary standard food processor (mixer/blender)


1. Idli Rava 
a. Using wet grinder
Serves: Makes upto 24 idlis; Preparation time: Upto half an hour of work, but pulses/batter take almost a day to soak+grind+ferment.


Ingredients:
1 rice cooker cup- Minappappu (Dhuli urad daal, Dehusked whole black gram, you can also used split gram)
2 rice cooker cups- Idli Rava
2 rice cooker cups- water
1 tsp Salt (or to taste)
  
Method:
1. Clean, wash & soak the Minappappu for 3 hours. (Put enough water so that the pulse is submerged in an inch of water.) 
2. Drain any excess water from the soaked Minappappu. (This drained water can be used later during the grinding process.) 
3. Add the soaked Minappappu gradually into the wet grinder jar along with some water and grind to a smooth fine paste. "Some water" here translates to 2 rice cooker cups of water. You can use the water that we drained in step 2, or fresh water. It may take upto 15 minutes to grind to a smooth fine paste. If you feel the pindi between your fingers, there should be no granules. 
4. Transfer this smooth fine pindi into a container. The pindi shouldn't occupy more than half of the container. We need to leave space for the pindi to rise during fermentation. 
5. Wash the Idli rava thoroughly in hot water to clean & soften it, drain away the water. (If the rava granules are large, you may consider soaking it in hot water for 15 minutes while the Minappappu is being ground.) 
6. Mix the washed Rava into the Minappappu pindi container along with salt. 
6. Cover this container and let it stand for 6 to 7 hours for fermentation. If you're living in severe winter conditions, you should keep it in the oven with the oven light on or the control set at "Keep Warm". Alternatively, place it in the boiler cupboard if you have one. The fermentation time may vary according to the "climate" the container is kept in. The pindi starts forming bubbles and rises, thereby increasing in volume. 
7. This pindi can be refrigerated for upto a week.


b. Using mixer


Ingredients:


(under construction, on a break until Manju pinni gets back, unless Kalyani didi has the recipes)


Tips & Tricks To-Get-It-Right:
1. Ramya: Soak a teaspoon of fenugreek seeds mixed into Minappappu and grind together, it quickens fermentation of the batter. 


II: COOKING


Equipment:
Idli mould plates with stand. 
Pressure cooker (into which Idli stand fits)
Fermented Idli batter

Cooking:
1. Stir the batter to make sure that it has uniform consistency, pour into Idli mould plates with a ladle.  
2. Stack the plates one on another using the stand. 
Position the plates in such a way that every individual idli mould has air vents below and above it (as shown in the photo). 
3. Pour water into the pressure cooker, around an inch in depth. 
4. Carefully lower the Idli stand into the pressure cooker and put on high heat. 
5. When the water comes to a rapid boil, cover the pressure cooker with its lid. However, do not put the pressure weight, let the steam escape continuously. 
6. Let it stay for 10 to 13 minutes. 
7. Turn off the heat. Open the pressure cooker when the safety valve drops. Take out the Idli stand and scoop out the Idlis


Serve with a generous topping of Ghee. Pair it with any Pacchadis, Podis, Sambar, Rasam. Idli is traditionally paired with Coconut chutney or Idli Chutney. This photo shows Idli Chutney


Monday, March 8, 2010

పుదినా పచ్చడి- Pudina pacchadi

Serves: upto 10 generous helpings; Preparation time: 40 minutes including washing/chopping/cutting/roasting/grinding.

Ingredients:    
3 tsps oil
1 tsp Cumin seeds (Jheera, Jilakara)
4 Dry Red chillies (Endu mirapakaya)
1 fistful Peanuts (Moongphalli, Vesinaggkaya)
1 fistful Sesame seeds (Til, Nuvvulu)
2 bunches- Mint (Pudina) greens
4 large stalks- Cilantro (Hara Dhania, Kotimeera)
1 tbsp Tamarind paste
1 medium sized onion
4 Green chillies
1.5 tsp Salt
1 tsp Sugar

(The Dry Red & Green chillies are to taste, use generously if you like the spice. Adjust the salt and tamarind accordingly. Large mild green chillies lend an awesome flavour to this recipe. Otherwise, use the usual small fiery Indian green chillies.)

Method:
1. Wash the greens (Pudina and Cilantro) in fresh running water. If the Pudina greens are young, they can be used whole. If the stems are fibrous, discard them & only use the leaves. Coarsely chop the Pudina and Cilantro. Set aside. Also chop the onion & green chillies into chunks and keep aside.
2. Heat 2 tsps of oil. When it is medium hot, add the dry red chillies broken into pieces. Roast them. When they are half done, add the Jheera. Add peanuts. Roast. When they are almost done (browned, giving off an aroma), add Sesame seeds. Switch off the flame when Sesame seeds splutter. Set aside.
3. Heat 1 tsp of oil. Add the chopped onions and green chillies, add salt. Roast them until they are half done. Transfer the contents into another cup and mix in the tamarind paste.
Now in this same saucepan (it will have left over traces of oil smeared), add the greens and roast them for 1 to 2 minutes until they partially wither in the heat.
4. Grinding:
In the blender, first add the mixture resulting from step (2). Blend with a little water to make a smooth paste. Next add the contents of step (3), these should be coarse ground using quick spurts of power on pulse so that the onion-green chilli chunks are still visible. Finally, add the withered greens and sugar, mix them in properly. Grind with quick spurts of power on pulse so that they are coarse ground.

Suggestions/Variations:

This Pacchadi is coarse ground, individual ingredients release an awesome medley of flavours & taste when crushed under our teeth as we eat, so make sure not to grind it too smooth.

Culture & Health:
This Pacchadi has the goodness of fresh Pudina (Mentha arvensis var. piperascens) & Cilantro- vitamins, antioxidants, essential oils, all those miracle phytochemicals, minerals. Peanut-Sesame provide protien and are a store-house of minerals. Half roasted onions & green chillies also provide vitamins & minerals. Traditional Andhra cuisine is full of such fresh chutneys and Pacchadis for a healthy lifestyle. Traditional cooks make Pacchadi fresh everyday, to make optimum use of antioxidants & those goodie-chemicals that get oxidized/denatured if stored. Moreover, it has such little oil, great taste along with health!!!


Trivia:
My favourite favourite pacchadi from childhood. This is my mother's recipe, she does very little cooking, but what little she does, she has some wonderfully yum recipes. I believe she learnt this recipe from her househelp-cook, Nagamani. How I used to pester Tittu to make this!
The recipe turned out very long in writing and explanation, but believe me, it is one of the easiest, you only need to chop the ingredients into large chunks, half roast them and lazily half-heartedly grind them coarse! :-P Put the minimum effort needed to make it, and you'll be surprized at how yummy it tastes. Thanks to Nagamani, wherever she is!

Monday, March 1, 2010

దొండకాయ కూర- Dondakaya koora (Ivy gourd)

Serves: 4; Preparation time: 45 minutes including preparing the ingredients and cooking


Ingredients:
2 lbs Dondakayalu (Kundru, Ivy gourd)- washed, dried and sliced
Salt to taste
A spice mix of:
1 tsp Cumin powder (Jheera, Jilakara)
1 tsp Coriander powder (Dhania)
1 tablespoon desiccated coconut powder (Copra)
Red chilli powder to taste
1 tsp Sugar
1/2 tsp Dry mango powder (Amchur)

Tempering:
Oil 1 tsp or 3 tbsps
0.5 tsps Mustard seeds (Avalu, Rai)
0.5 tsps Cumin seeds (Jilakara, Jheera)
0.5 tsps Turmeric powder (Pasupu, Haldi)
0.5 tsps Asafoetida (Inguva, Heeng)

Method:
There are two ways of preparing this dish: Steamed with less oil for the health conscious; Fried with lot of oil for the food lovers.
1. Heat oil in a saucepan (1 tsp is enough for a steamed dish. Take upto 3 tablespoons if frying.)
2. Add mustard seeds. When they crackle, add Cumin seeds, turmeric powder, asafoetida. (Omit mustard seeds and cumin seeds from the recipe if frying as they get burnt during frying process.)
3.  Add the ivy gourd slices to this tempering.
4. If you're steaming them, sprinkle upto 1 tablespoon of water and cover. If you're frying, no need to add water.
5. Uncover and stir every 5 minutes so that they are evenly cooked.
6. It may take upto 15 minutes for the vegetable to soften. Add salt when almost done. Frying takes even longer, fry until the slices turn dark brown, keep the pan uncovered during the final stages of frying. Drain any excess oil when done with frying.
7. When the vegetable is cooked, add the spice mix (red chilli powder, sugar, coconut/Coriander/Cumin/Dry mango powders). Cook for 3 minutes and turn off the heat. Serve with rice.


Precautions/Variations/Notes:
For fried ivy gourd, it comes out best if the gourds are thinly sliced into rounds, thereby exposing more surface area for frying. However, this takes lot of time. Steaming is a much faster healthier (and not as tasty) process, and the gourds can be cut into thicker rounds or even quartered into fours lengthwise.
Traditional cooks advise to discard any ripe red fruit, but I love the ripe red ones too, they have a unique flavour that I find so yummy when fried.
Kalyan annaya suggests: Add some fine chopped onions & green chillies in the fry, omit the Copra powder/red chilli powder, makes for a yummy variation.
Sometimes I add a tablespoon of minced tomatoes to the salt-spices-sugar, let it marinate for 15 minutes and mix it into the almost-done fry, I omit the Amchur. Like I always believe, follow your heart!

Health benefits:
Coccinia grandis is rich in fiber and beta-carotene. It is an excellent food for diabetic people as it has a low Glycaemic Index. That is, it takes a lot of time for our body to digest and break down into carbohydrate sugars and finally absorb it into our bloodstream. 


Culture & Trivia:
My favourite, Krishna's favourite, Kaavya's favourite. Are there any more fans out there? I love you Dondakaya!
Also called Gentleman's toes, in contrast with Lady's finger. Interestingly, the names rhyme even in Telugu, Dondakaya and Bendakaya!
Krishna tells me of a belief that consuming dondakaya makes one dumb, whereas consuming bendakaya (Lady's finger) makes one bright. Rest assured my darling dondakaya fans, it won't make us dumb, it's actually very good for health. Also, this vine grows upto 4 inches a day, very easy to propagate, mammoth task to get rid of as a weed, so it should signify speed & perseverance, not slow dumbness! Dear dondakaya, how you have been mislabeled by some, I am here to redeem you ;-)