Showing posts with label Idli. Show all posts

Wednesday, November 3, 2010

రవ ఇడ్లి/ Rava Idli/ Steamed Semolina cakes

(Makes 8 to 10 idlies)

INGREDIENTS:

Rava/sooji/semolina------1 cup (rice cooker measure)
Fresh curd/perugu/yogurt---1and 3/4 cup
Water----------------------1/2 cup
Salt to taste
Cashews ------------- 6
Cooking soda----------1/4 tsp


Seasoning:

Avalu/mustard seeds---------1/2 tsp
Bengalgram dal/sengapappu--1tbs
Split black gramdal------------1/2tbs
Curry leaves------------------few
Red chillies -------------------1 or 2 (cut in to pieces)
Oil----------------------------1 tbs.

METHOD:

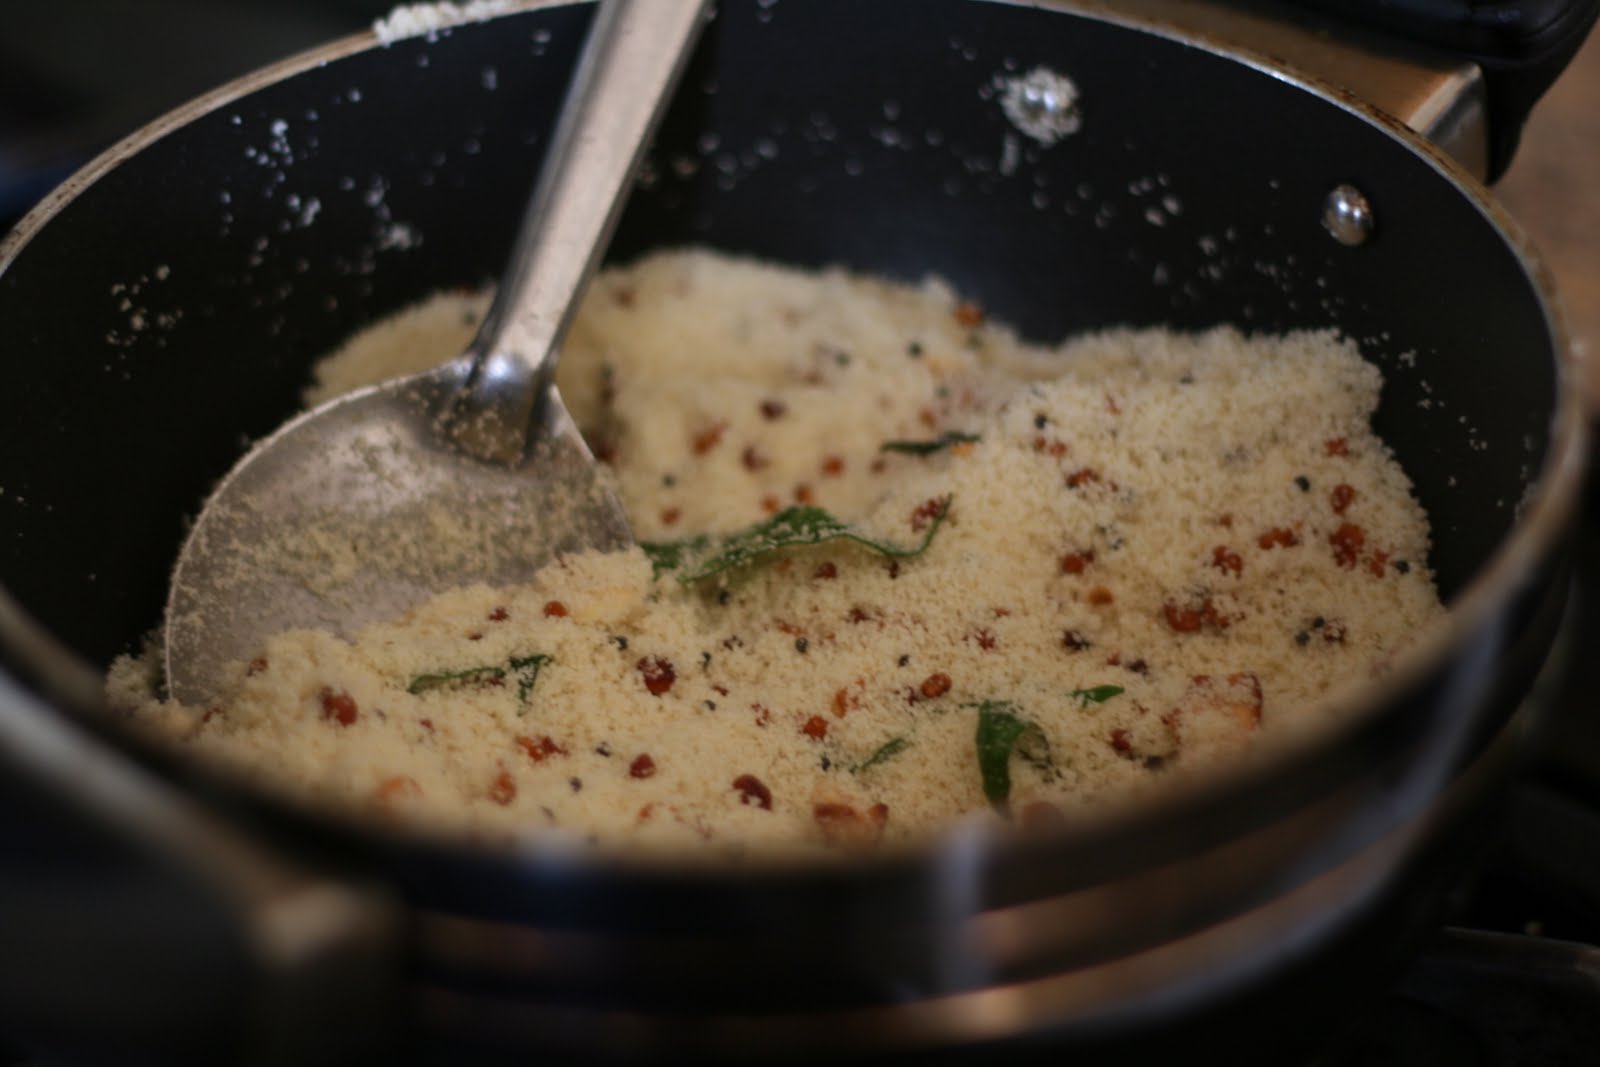
1.Heat oil in a pan and add seasonings.
2.When it is done add curry leaves and rava.
3.Fry rava lightly and let it cool.
4.Take curd add rava, salt, water and cooking soda mix well(you can add more water until you get idli batter consistency) and keep aside for 10 minutes.
5.Grease idli moulds pour batter and steam for 10 minutes
6.Rava idli is ready to eat.

You can store fried rava mixture. You can add yogurt and water to the mixture when ever you want to make idlies.
Eat with chutney or chutney powder.

Variations: You can add grated carrots and tomato slices in it.

Wednesday, September 22, 2010

Fried Idli with vegetables

Serves: Two persons. Preparation time: 15 minutes. 
Ingredients:
18 small Idlis (refer to Idli recipe)
Ghee/oil to roast the Idlis
Cilantro
1 Tsp Salt

For tempering:
1 Tbp Oil
1 Tsp Mustard seeds
1 Tsp Jheera Seeds
1 Tsp Red chilli powder
1/2 Tsp Turmeric
1 pinch Asafoetida
1 pinch Fenugreek powder
5 curry leaves

Chopped vegetables:
Green bell pepper/Capsicum
Carrot
Green chilli
Onion
 Potato
Soft ripe Tomato
Fistful  of green peas

Method:
1. Quarter the idlis and set aside. 
2. Place the oil on medium heat in a saucepan. When it is hot, add mustard seeds. When they crackle, add all the tempering ingredients and the vegetables (but not the tomatoes). 
Mix well, cover and let it cook until the vegetables are done. It takes around 10 minutes, you can further roast them uncovered for longer if you like them crisp. You can add the salt right at the beginning, since salt draws moisture out of the vegetables & makes them crisp. However, if you want your vegetables steamed soft, add salt later. When the vegetables are almost done, add the chopped tomatoes and cook until the mixture looks slightly soupy. You may add some water/tomato juice if the tomatoes aren't juicy enough.
Meanwhile,
3. In a skillet, pour a few drops of oil/ghee, arrange the quartered idlis on the surface of the skillet and let them roast until you see the bottoms turning brown. Pour ghee generously if you like a fried effect. The idlis can be turned over to roast the other side too, however, I like one side done crisp, and the other side left undone. Transfer the browned quarters onto blotting paper and set aside. Fry/roast the next batch. 


When the vegetables are ready and the idlis are done, 
4. Add the idli quarters into the vegetables and mix in thoroughly. The soft side of the idlis absorbs the oil/soup of the vegetables while the roasted side stays crisp. Some of the idli quarters crumble during the mixing process. Cover & cook for a few minutes so the idlis soak up the soup/spice . Garnish with cilantro.
Serve hot. Goes well on its own and also with yogurt. 


Suggestions/Variations:
1. Fried Idli: Some people like to deep fry the idli quarters and serve them with chat masala
2. Idli Upma: Idli quarters/mashed Idlis are used instead of upma rava, and the item is prepared as per Rava upma recipe. 
3. You can follow your heart for this recipe, add whatever spice you like, add/omit vegetables as you wish, experiment with sweet corn, carrots, beans, include peanuts, bengal gram, etc.

Culture & Health:
This is a very mix & match dish usually prepared with leftover idlis. If you have very few leftover idlis, the addition of vegetables adds volume to the dish along with a varied taste. It can also be prepared with freshly prepared cooled idlis (hot idlis get mashed easily when handled).
Idli is a good source of protein & carbohydrate, the addition of vegetable makes it a complete balanced diet.

Trivia:
Whenever I have lots of Idli batter and I am bored of plain idli, I find this a very easy quick fix which is simply awesome to taste, with the added health benefits!!

Tuesday, March 9, 2010

ఇడ్లి పిండి: Idli Pindi- (South Indian rice cake batter)


THE COMPLETE IDIOT'S GUIDE TO MAKING IDLI BATTER

History:
All my life, my very busy parents made us eat idlis every morning. A very easy recipe, the batter can be stored in the refrigerator, it just cooks without needing to be watched over, a balanced diet of carbohydrate-protein. Westerners are obsessed about 'live cultures' and 'probiotics'. Well, Idli is full of that magic ingredient!
I always took Idli for granted, it was the Yatra-Tatra-Sarvatra in our home. 
But I never bothered to closely watch my dad as he prepared the batter, and hence, I was unable to replicate it in my own kitchen. Every lady seems to have her own recipe & her own armour of tricks to "get-it-right", I was confused with the variety of advice pouring in, but my batter never turned out perfect. I made all kind of errors that I can write a book on! I had the simplest doubt which nobody was able to solve on phone, "How much water to add?". How much water equals "some water"? How much water equals "enough water"? And Idli pindi seems to be the benchmark in all batter based cooking. When my sister explained the "very easy Malpova" recipe, she said, "the batter should be thinner than Idli but thicker than dosa. I was at a loss, how can I progress in cooking if I don't master the benchmark? Unfortunately for me, phone conversations and textual explanations couldn't help, I needed a live demonstration, but I had no experienced person near me to help. 
I thought I was the only confused soul, but I noticed other cousins too were confused (though nobody turned out as pathetic as me). 
Then Manju pinni came to our rescue, she took up the mammoth task of answering my "water" question. She said they too had such doubts when they were new to the kitchen, but they could watch & learn. Whereas our generation is dispersed here & there, we live alone without parental guidance. So she decided to make life easier for cooks like me. So here I am, compiling the "Complete Idiot's guide to making Idli batter". I own up to being an Idli Idiot, I couldn't master the "easiest" recipe of Andhra cuisine in one year of marriage. 
Thanks to Manju pinni for transforming this idiot into somebody who can dare to cook idlis!!! 
I was amazed at how much Manju pinni knows about Idlis, she is a perfect trouble-shooting guide, full of tips & suggestions, warnings, tricks, variations. Wow, no wonder they say that our Indian culture is preserved in our family traditions, in our kitchens. The mother of the house is a repository of knowledge, things she learnt from her own experimentation, things that were passed down to her from her mother & mother-in-law, she carries the gastronomical history of our ancestors.
I will keep updating this blog entry as and when we learn more from Manju pinni on the mysteries of "Idli". I request readers to pass on any valuable comments, I will include them into the revised version. 
I do not take ownership for this blog entry, I am merely the compiler, the idea & research behind this belongs entirely to the senior contributors of this blog. 


I: BATTER


Methods:
I say "methods" instead of method, because there are several variations in the basic idli recipe. The minappappu is standard. But the other component (Idli rava, ordinary rice, parboiled rice) changes, and so does the grinding equipment (grinder or mixer).  They are listed as follows:


1. With Idli rava
a. using electric wet grinder with stone base
b. using ordinary standard food processor (mixer/blender)


2. With ordinary rice
a. using electric wet grinder with stone base


b. using ordinary standard food processor (mixer/blender)


3. With parboiled rice "Uppudu beeyam"


a. using electric wet grinder with stone base


b. using ordinary standard food processor (mixer/blender)


1. Idli Rava 
a. Using wet grinder
Serves: Makes upto 24 idlis; Preparation time: Upto half an hour of work, but pulses/batter take almost a day to soak+grind+ferment.


Ingredients:
1 rice cooker cup- Minappappu (Dhuli urad daal, Dehusked whole black gram, you can also used split gram)
2 rice cooker cups- Idli Rava
2 rice cooker cups- water
1 tsp Salt (or to taste)
  
Method:
1. Clean, wash & soak the Minappappu for 3 hours. (Put enough water so that the pulse is submerged in an inch of water.) 
2. Drain any excess water from the soaked Minappappu. (This drained water can be used later during the grinding process.) 
3. Add the soaked Minappappu gradually into the wet grinder jar along with some water and grind to a smooth fine paste. "Some water" here translates to 2 rice cooker cups of water. You can use the water that we drained in step 2, or fresh water. It may take upto 15 minutes to grind to a smooth fine paste. If you feel the pindi between your fingers, there should be no granules. 
4. Transfer this smooth fine pindi into a container. The pindi shouldn't occupy more than half of the container. We need to leave space for the pindi to rise during fermentation. 
5. Wash the Idli rava thoroughly in hot water to clean & soften it, drain away the water. (If the rava granules are large, you may consider soaking it in hot water for 15 minutes while the Minappappu is being ground.) 
6. Mix the washed Rava into the Minappappu pindi container along with salt. 
6. Cover this container and let it stand for 6 to 7 hours for fermentation. If you're living in severe winter conditions, you should keep it in the oven with the oven light on or the control set at "Keep Warm". Alternatively, place it in the boiler cupboard if you have one. The fermentation time may vary according to the "climate" the container is kept in. The pindi starts forming bubbles and rises, thereby increasing in volume. 
7. This pindi can be refrigerated for upto a week.


b. Using mixer


Ingredients:


(under construction, on a break until Manju pinni gets back, unless Kalyani didi has the recipes)


Tips & Tricks To-Get-It-Right:
1. Ramya: Soak a teaspoon of fenugreek seeds mixed into Minappappu and grind together, it quickens fermentation of the batter. 


II: COOKING


Equipment:
Idli mould plates with stand. 
Pressure cooker (into which Idli stand fits)
Fermented Idli batter

Cooking:
1. Stir the batter to make sure that it has uniform consistency, pour into Idli mould plates with a ladle.  
2. Stack the plates one on another using the stand. 
Position the plates in such a way that every individual idli mould has air vents below and above it (as shown in the photo). 
3. Pour water into the pressure cooker, around an inch in depth. 
4. Carefully lower the Idli stand into the pressure cooker and put on high heat. 
5. When the water comes to a rapid boil, cover the pressure cooker with its lid. However, do not put the pressure weight, let the steam escape continuously. 
6. Let it stay for 10 to 13 minutes. 
7. Turn off the heat. Open the pressure cooker when the safety valve drops. Take out the Idli stand and scoop out the Idlis


Serve with a generous topping of Ghee. Pair it with any Pacchadis, Podis, Sambar, Rasam. Idli is traditionally paired with Coconut chutney or Idli Chutney. This photo shows Idli Chutney